First, select New from the top of the Pages tab or by right-clicking on a page in one of the views and selecting New from the context menu.
) |
| 'New...' page button and context menu option |
Tip: When you create a new page from the context menu of an existing page, the new page inherits the Template and Group Membership properties of that page. The new page is also automatically made that page's child. (These settings can be changed during the wizard setup.) This can save time when creating several pages at once.
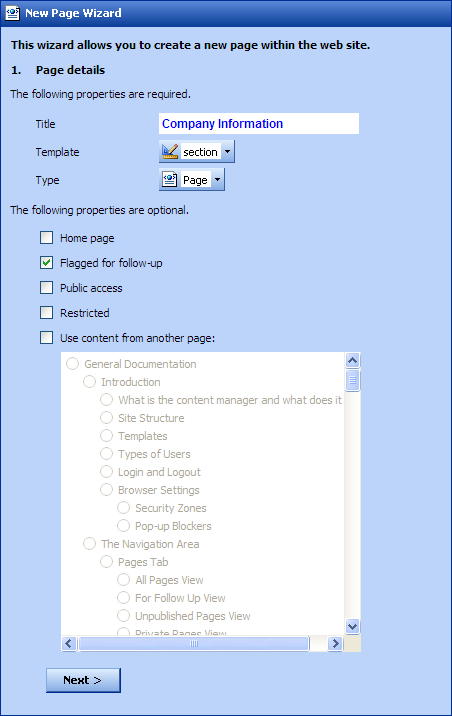
The New Page Wizard screen will appear. Here you will type in the Page Title. Make sure the title is descriptive and concise.
Page Titles and Templates
Organization names are often included in the title of each page. Titles are used by search engines as indications of page content and they tell visitors what website they have come to.
The organization name is usually appended to the title in the template programming so that the organization name automatically appears as part of the web page title seen by the public, without being part of the page title in the Content Manager.
Select the Template the page will use. If you don't select the right one you can easily change it later. Usually there is a template labeled 'Default' which is suggested for most pages; you can preview the page after adding content later.
Check or uncheck the Flagged for follow-up checkbox depending on whether or not you want the page to show up in the For Follow Up view. This has no affect on how the page will appear on the website.
Check or uncheck the Public access box to make the page viewable to the public or to keep it hidden. (If a visitor attempts to access a hidden page, they will be redirected to the home page. This behavior is dependent on template programming.)
Check or uncheck the Restricted checkbox to make this page hidden in the CMS from authors and editors who have not been given explicit access.
Hit the Next button.
 |
| New Page Wizard step 1 - Page Details |
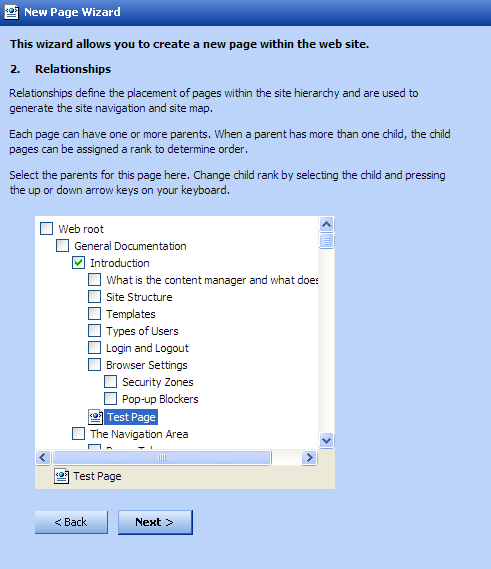
Once the page has been created, it is necessary to specify where in the Site Structure it will reside. From the Relationships screen, specify where this new page will exist. In the example below the newly created page entitled 'Test Page' will reside under the page entitled 'Introduction'.
Hit Next.
 |
| New Page Wizard step 2 - Relationships |
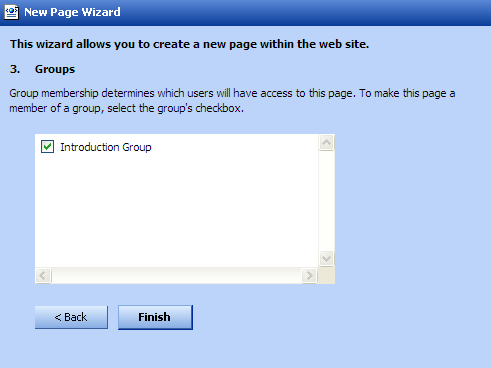
If you wish to add the page to a Group, simply select the checkbox next to an existing Group and hit the Finish button. You can also create a new Group later and add this page to it through the Group Members screen.
Note: If no Groups have been added to the Content Manager yet, this step will be skipped.
 |
| New Page Wizard step 3 - Groups |
When a page is no longer required, it can be deleted by simply hitting the Delete Page button on the Properties Screen. A dialog pop-up box will appear to make sure that the Delete Page button wasn't selected in error. Hit OK to delete or Cancel to keep the page.
Once the page has been created, content can be entered through the Content Area.
Enter text and/or image content into the content area. See previous parts of this documentation on image editing instructions, text formatting, links, and image placement. Once all content has been entered, make the page public (if it is not already) and publish the changes.