The Properties Screen provides settings specific to the page being edited. The page Title and Template are displayed along with whether or not the page has been Flagged for Follow Up and/or is available for Public Viewing. Additionally, it is possible to pull content from other pages to populate the selected page.
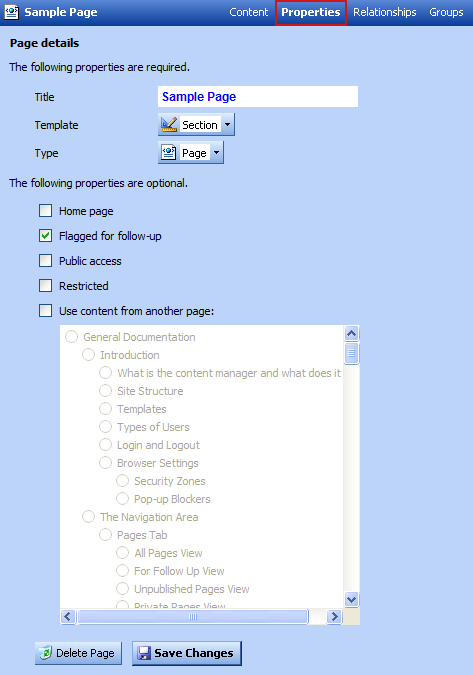 |
| Properties button and screen |
The three required properties are listed here:
- Title
This is the title of the page, both as it appears in the Navigation Area and on the website itself. The title, plus typically the business name, will appear in the titlebar of the web browser and is the default label of Internet shortcuts to the page. It should be brief and relevant to the page content. - Template
The template defines everything surrounding the editable content as well as the dimensions and styles used in editable content. Special templates include programming specific to their intended function. For example, a template used for a contact form will include a function that processes the submitted form and sends an email to the designated recipient. - Type
The page type is used mostly during the development stage of the website. The two available types are Page and Container. In almost every case the type should be set to 'Page'. Website navigation is often derived from the Container type, for example the main navigation menu might include links for each child of a Container labeled 'Sections'. Because of their role in the website structure, Container pages should not be modified or removed. They are also not meant to include editable content of their own.
 |
| Title, Template, and Type fields |
The Home page checkbox allows any page to be designated as the home page, the first page that visitors will see when coming to the site using only the hostname ('www.example.com'). Since the home page content is unique and represents the �front door� to the site, this checkbox should seldom be used after the initial website development.
 |
| Home page checkbox |
Often when there are multiple people working on revisions, it can be helpful to �flag� a page or pages for others to review (or for review by oneself later). By checking the Flag for follow-up box, this identifies the page being edited as one that needs to be reviewed. (It does not affect whether the page appears on the public website.) These pages are consolidated within the Special Pages area and can be viewed by clicking For Follow Up.
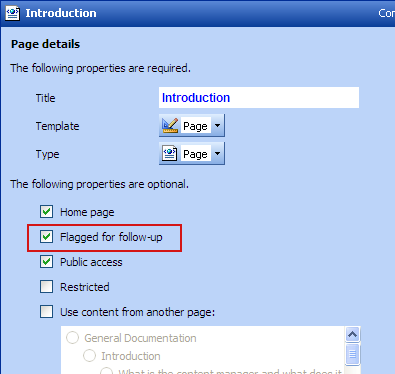 |
| Flagged for follow-up checkbox |
The Public access checkbox allows a page to be hidden without actually deleting its contents. This is useful when a page's content becomes outdated or inaccurate. It can be temporarily and easily removed from view while new content is developed. When the page is updated and ready to be viewed again, checking the Public box will make it viewable once again. These pages are consolidated within the Special Pages window and can be viewed by clicking Private Pages.
Note: Making a page �Private� might affect navigation to its child pages if it is necessary to go to the private page in order to navigate to its children.
 |
| Public access checkbox |
Under normal circumstances, users can view all pages in the CMS, including pages they have not been assigned authoring or editing privileges to (with read-only access).
The Restricted checkbox allows page contents to be hidden from other CMS authors and editors. When this box is checked, only users with explicit access to edit the page will be able to view it in the CMS.
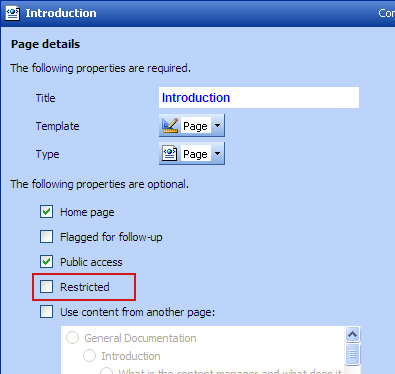 |
| The Restricted checkbox |
Users without explicit access will see the following message upon selecting a page in the navigation pane.
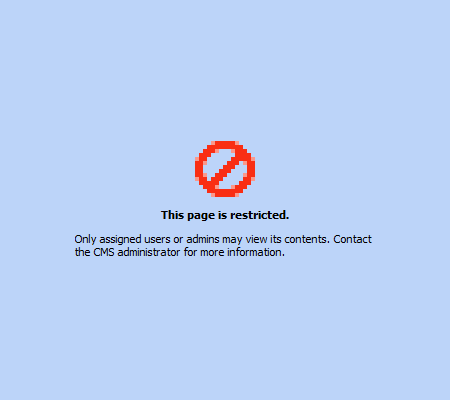 |
| Page restriction notice |
Note that the page template must be programmed to check the restricted setting, otherwise the page contents will still be viewable on the actual website. This is normally only done for websites that require user authentication, such as intranets.
Administrators can access any page regardless of restricted status.
In some cases it is necessary to have the same content appear on two different pages. The extra work of synchronizing content for each page is relieved by the ability to pull content from another page.
The Content Manager allows the exact content from one page to used in another. The Use content from another page checkbox allows for this content sharing. By checking the box and selecting a page from the area underneath, the content from the selected page will be displayed on the current page.
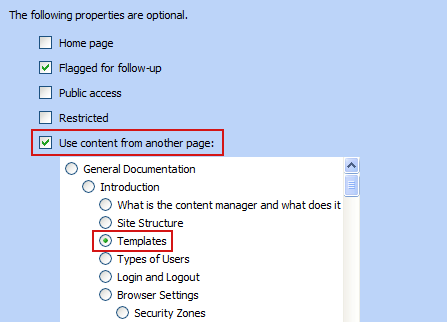 |
| Example of redirecting page content |
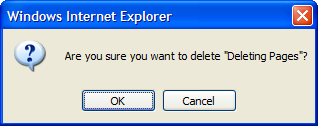
When a page is no longer required, it can be deleted from the Properties Screen. Simply select the Delete Page button. A dialog pop-up box will appear to make sure that the Delete Page button wasn�t selected in error. Hit OK to delete or Cancel to keep the page.
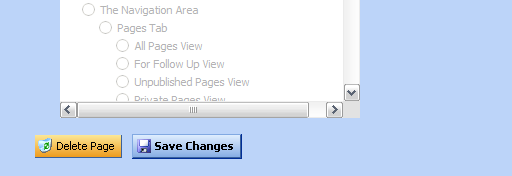 |
| Delete Page button |
 |
After changing any of the information within the Properties Screen, hit the Save Changes button before going on to another page.
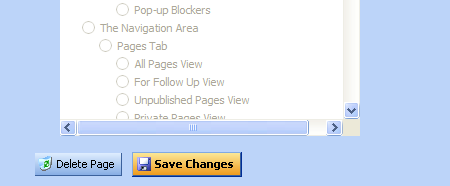 |
| Save Changes button |